
Repotting can give a tired houseplant fresh room to grow, but it can also set a plant back if you rush the process or use the wrong setup. The good news is that most indoor plants handle repotting well when you do it at the right time and make a few careful choices before they ever leave the pot.
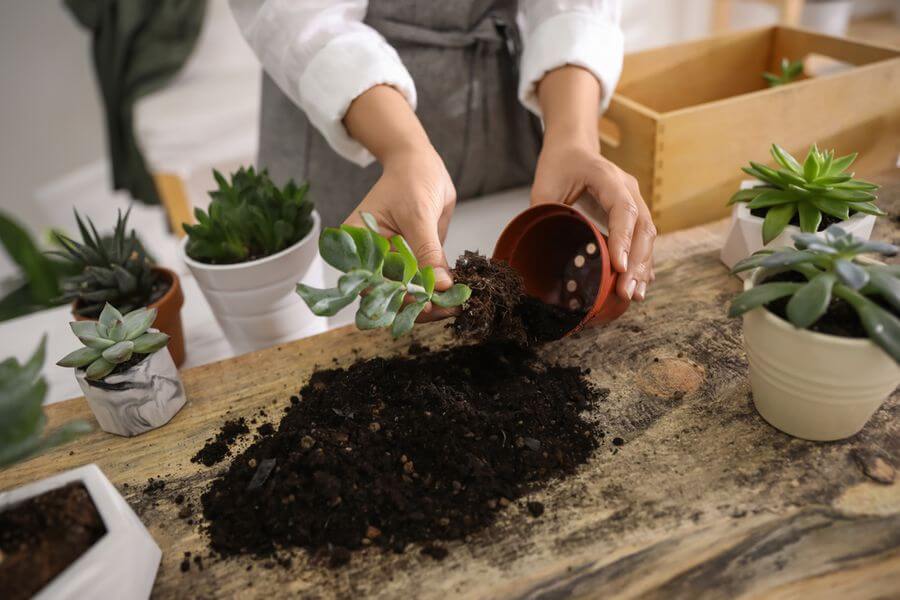
In this guide, you’ll learn how to repot indoor plants without stressing them, how to tell when repotting is actually necessary, and what to do after the move so your plant settles in faster.
Why It Matters When You Repot Indoor Plants
Over time, potting mix breaks down, roots fill the container, and watering becomes less consistent. A plant that once thrived can start drying out too quickly, staying soggy for too long, or looking stalled even when your routine has not changed.
Repotting helps by:
- giving crowded roots more space
- refreshing old soil that no longer drains well
- making it easier to correct watering problems
- supporting healthier new growth
That said, not every plant needs a bigger pot right away. Sometimes a simple soil refresh is enough.
Signs It Is Time to Repot Indoor Plants
Look for a pattern instead of reacting to one small issue. A houseplant may be ready for repotting if you notice several of these signs:
- roots circling the surface of the soil or coming out of drainage holes
- water running straight through the pot without soaking in well
- the plant wilting faster than usual between waterings
- slowed growth during the active growing season
- the plant becoming top-heavy and unstable
- soil that looks compacted, tired, or broken down
If your plant still has room, looks healthy, and holds moisture reasonably well, you may not need to repot yet.
The Best Time to Repot Indoor Plants
The easiest time to repot most indoor plants is during active growth, usually in spring or early summer. That is when roots recover more quickly and the plant can adjust to fresh soil with less stress.
You can still repot at other times if the plant clearly needs it, especially if it is rootbound or stuck in poor soil. Just avoid making multiple changes at once. For example, try not to repot, prune heavily, and change lighting all in the same week.
Choosing the Right Pot When You Repot Indoor Plants
One of the most common mistakes is moving a plant into a container that is far too large. More space sounds helpful, but oversized pots can hold excess moisture around the roots and make watering harder to manage.
As a general rule, go up just one pot size, or about 1 to 2 inches wider than the current pot for small to medium houseplants. Make sure the new pot has drainage holes.
If your current container size is fine but the soil is exhausted, you can often keep the same pot and simply refresh the potting mix.
The Right Potting Mix to Repot Indoor Plants Into
Fresh soil is one of the biggest benefits of repotting. Choose a mix that matches the plant’s needs instead of using a heavy one-size-fits-all blend for everything.
For a general overview of what makes a good mix, see our guide to indoor plant soil and compost.
- Tropical houseplants: usually prefer a loose, well-draining mix that still holds some moisture.
- Succulents and cacti: need faster drainage and more grit.
- Moisture-loving plants: often do better with a mix that retains some water without turning dense.
Whatever you use, avoid compacting the soil too firmly when you fill the new pot.
How to Repot Indoor Plants Step by Step
- Water lightly the day before if the soil is bone dry. Slightly moist soil is easier to work with and reduces root breakage.
- Gather your supplies. You will need the new pot, fresh potting mix, clean scissors or pruners, and a tray or surface that can get messy.
- Remove the plant gently. Support the base, tip the pot, and slide the plant out without yanking on the stems.
- Inspect the roots. Healthy roots are usually firm and light in color. Trim only clearly dead, mushy, or damaged roots with clean tools.
- Loosen tightly circling roots. If the plant is rootbound, tease the outer roots apart gently with your fingers.
- Add a base layer of fresh mix. Place enough soil in the bottom so the plant sits at the same height it was growing before.
- Set the plant in place. Center it in the new pot and fill around the sides with potting mix.
- Firm the soil lightly. Press just enough to remove big air pockets, but do not pack it down hard.
- Water thoroughly. Let excess water drain out fully.
How to Reduce Transplant Stress
Even a healthy repot can leave a plant looking slightly droopy for a short time. The goal is to minimize that adjustment period.
These simple steps help:
- keep the plant in similar lighting conditions after you repot indoor plants
- avoid direct harsh sun for a few days if the plant is already stressed
- do not fertilize immediately after you repot indoor plants
- wait until the plant starts settling in before making more changes
- monitor moisture carefully since fresh soil dries differently than old soil
If lighting has already been a challenge in your space, review these tips on indoor plant light so your plant does not have to recover in poor conditions.
Aftercare in the First Two Weeks
The first week after you repot indoor plants is mostly about observation. Do not assume the plant needs more water just because it looks slightly off on day one. Check the soil before watering again.
During the first two weeks:
- keep watering based on soil moisture, not a rigid schedule
- hold off on fertilizer until you see active recovery or new growth
- watch for yellowing, prolonged drooping, or soggy soil
- maintain stable temperature and humidity if possible
If your home air runs dry, especially around heating or cooling systems, it can help to review practical ways of increasing humidity for indoor plants.
Common Mistakes People Make When They Repot Indoor Plants
- Choosing a pot that is too large: this often leads to wet soil that takes too long to dry.
- Repotting too often: unnecessary disturbance can slow growth.
- Using the wrong soil texture: poor drainage and poor aeration both cause trouble.
- Breaking too many roots: aggressive handling creates more shock.
- Fertilizing right away: freshly disturbed roots are more sensitive.
- Ignoring pests before repotting: if a plant already has an issue, inspect it first and review how to prevent indoor plant pests.
Do All Indoor Plants Like Being Repotted?
No. Some houseplants are more forgiving than others. Fast growers often appreciate fresh soil and a little extra room. Others prefer to stay slightly snug in the pot and only need occasional soil replacement.
That is why it helps to assess the plant itself instead of repotting everything on the same schedule. If the plant looks healthy, is growing steadily, and water management still feels easy, you can probably wait.
Do You Need to Repot Indoor Plants, or Just Water Them?
A great many houseplants get repotted when they did not need it, and the confusion is nearly always between a rootbound plant and a plant that is under-watered or under-lit. The symptoms overlap almost completely — wilting, slow growth, yellowing lower leaves — so the only reliable answer is to look at the roots.
Slide the plant out and look. Support the stem, tip the pot, and ease the rootball out. This causes no harm and tells you everything. A rootbound plant has roots circling the outside of the ball in a dense mat, often with more root than soil visible. A plant with plenty of room has soil visible across most of the surface with roots running through it.
Roots out of the drainage hole are suggestive, not conclusive. A single root escaping means nothing; a mat of them means the plant has run out of room.
Water running straight through usually means the pot is more root than soil, so there is nothing left to hold moisture. This is one of the more reliable signs.
Drying out within a day or two of watering points the same way, particularly if the plant used to hold moisture for a week.
Soil pulling away from the pot edge can indicate compacted, exhausted mix rather than crowding. That is still a reason to repot indoor plants, but it means fresh mix in a same-size pot rather than a bigger one.
If the roots look fine, the problem is elsewhere — usually light, watering rhythm or humidity — and repotting will set the plant back rather than help it.
Pot Size and Material When You Repot Indoor Plants
The pot decision does more damage than any other part of repotting indoor plants when it goes wrong, and it almost always goes wrong in the same direction.
Go up one size, not three. Two to five centimetres wider in diameter is the standard advice and it is correct. A pot that is far too large holds more wet soil than the roots can use, and soil that stays wet without roots drawing on it is how root rot starts. The instinct to “give it room to grow” is the single most common way to kill a healthy plant when you repot indoor plants.
Drainage holes are non-negotiable. Decorative pots without holes are cachepots — keep the plant in a plastic nursery pot inside them and lift it out to water. A layer of gravel at the bottom of a hole-less pot does not create drainage; it raises the waterlogged zone.
Terracotta breathes, plastic holds. Unglazed terracotta wicks moisture out through the walls, which suits succulents, cacti and anyone who tends to overwater. Plastic and glazed ceramic hold moisture longer, which suits ferns, calatheas and people who forget.
Weight matters for tall plants. A large plant in a lightweight plastic pot will topple. Ceramic or a weighted base solves it.
Clean second-hand pots properly. Scrub off mineral crust and wash with hot soapy water. Old pots can carry pathogens and pest eggs, and it is a five-minute job to remove the risk.
Indoor Plants That Resent Being Repotted
Some houseplants take badly to being moved, and knowing which ones saves a good deal of disappointment when you repot indoor plants.
Snake plants and ZZ plants actively prefer being crowded and flower more readily when tight in a pot. Repot every three or four years at most, and only when the pot is visibly straining.
Peace lilies bloom better slightly rootbound. Repot when growth genuinely stalls rather than on a schedule.
Orchids need repotting for a different reason entirely — the bark medium breaks down and suffocates the roots — so it is about the medium rather than the space, usually every one to two years, and into orchid bark rather than potting compost.
Ferns and calatheas are among the fussiest. They dislike root disturbance and will sulk visibly for weeks. Handle the rootball as little as possible and expect a slow recovery.
Succulents and cacti should be repotted into dry mix and left unwatered for several days afterwards, so that any damaged roots can callus rather than rot.
Fiddle-leaf figs drop leaves at the slightest provocation. Repot only when genuinely necessary, keep everything else about their conditions identical, and accept some leaf loss.
General houseplant repotting guidance from horticultural extension services — the University of Minnesota Extension’s houseplant pages are a good example — consistently emphasise the same point: repot indoor plants because the plant needs it, not because it is spring or because a new pot looked appealing.
What to Do If a Plant Sulks After You Repot Indoor Plants
Some setback is normal after you repot indoor plants. Knowing what is normal and what is not is the difference between waiting patiently and losing a plant.
Expected, and fine: a few days of drooping, one or two lower leaves yellowing and dropping, and no visible new growth for two to four weeks. All of this is the plant redirecting energy into root establishment. Do nothing.
Not fine: rapid leaf loss across the whole plant, a soft or mushy stem base, a sour smell from the soil, or soil that stays wet for more than a week. These point to root rot, usually from a pot that was too large or a mix that holds too much water.
If you suspect rot, take the plant out again immediately. Trim away any black, soft roots with clean scissors, let the rootball dry for a few hours, and repot into fresh, well-draining mix in a smaller pot. Acting within a few days usually saves the plant; waiting a fortnight usually does not.
Do not fertilise for four to six weeks. Fresh potting mix already contains nutrients, and feeding damaged roots burns them. This is the most common well-intentioned mistake after people repot indoor plants.
Do not move it somewhere brighter to “help it recover”. Changing two variables at once means you will not know which caused what, and a stressed plant handles more light badly.
Water less, not more. A plant with reduced roots takes up less water. Watering to a schedule set before repotting is how a struggling plant becomes a rotting one.
The single best thing you can do after repotting is to leave the plant alone in its usual spot and be patient. Almost everything that goes wrong in the fortnight afterwards comes from intervening.
FAQ: How to Repot Indoor Plants
How often should I repot indoor plants? Fast growers roughly annually, most houseplants every eighteen months to two years, slow growers every three or four years. Let the roots decide rather than the calendar.
Can I reuse old potting soil? Not for a plant that was struggling, and not without refreshing it. Old mix is compacted and depleted. If the previous plant was healthy, mixing it half and half with fresh compost is reasonable for less demanding plants.
Should I loosen the roots? Gently tease apart circling roots on a badly rootbound plant, and on very tight rootballs make a few shallow vertical cuts. Do not do this to ferns, calatheas or anything you know resents disturbance.
Do I need to prune the top when I repot? Only if you have removed a significant amount of root. Balancing the two helps the plant cope; otherwise leave the foliage alone.
Can I repot a flowering plant? Better not. Wait until flowering has finished — the plant cannot support blooms and root recovery at once.
Is autumn or winter repotting always wrong? Not always, but it is harder. Growth is slow, so recovery takes longer. If a plant is genuinely rootbound or rotting, repot regardless of season; if it can wait until spring, let it.
What if the plant is enormous and I cannot lift it? Top-dress instead: scrape off the top five centimetres of old soil and replace it with fresh mix. It refreshes nutrients without the disturbance, and it is what commercial growers do with large specimens.
Final Thoughts on How to Repot Indoor Plants
Repotting indoor plants does not have to be dramatic. In most cases, the least stressful approach is also the simplest one: move up only slightly in pot size, use a suitable fresh mix, handle the roots gently, and avoid overcorrecting after the move.
When you treat repotting as part of regular plant care instead of an emergency fix, your houseplants usually bounce back faster and grow more confidently.
If you are building a stronger plant-care routine overall, explore more of our indoor gardening guides for help with light, soil, humidity, and everyday maintenance.
Quick Checklist Before You Repot Indoor Plants
- repot during active growth when possible
- choose a pot only 1 to 2 inches wider
- use fresh, well-suited potting mix
- loosen roots gently, do not over-handle them
- water thoroughly after repotting
- skip fertilizer until the plant settles in
Next step: If your plant is still struggling after repotting, check whether the real issue is light, humidity, watering, or soil quality rather than the pot itself.
